Stylish budget decor is completely achievable when you know how to stretch discount craft supplies into custom, design-forward pieces. This guide walks you through practical, creative ways to refresh your home decor with inexpensive materials while still looking polished and intentional.
Chic Room Makeovers With Discount Craft Finds
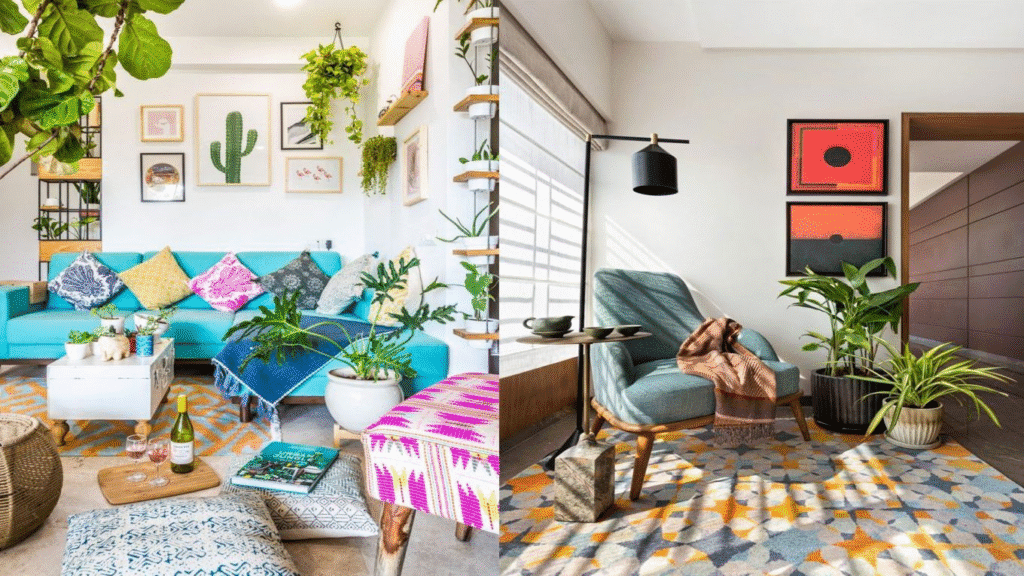
Chic room makeovers do not have to start at the furniture store. They can start in the discount bin of your local craft shop or dollar section of a big-box store. With a clear design vision and a bit of patience, marked-down craft items can transform tired rooms into fresh, cohesive spaces. The key is to see beyond bright sticker labels and cluttered shelves to the shapes, textures, and potential hidden inside each piece.
From hands-on work with clients, I have found that creating a simple mood board before shopping keeps budget decor decisions focused. Choose a color palette of two to three main hues and one accent color, then look for discount craft supplies that fit or can easily be painted to match. This helps avoid random purchases that do not fit the final look, which is where many budget projects can lose both money and style. When in doubt, neutral bases like white, black, or light wood are the easiest to unify into a chic aesthetic.
A chic room makeover using discount craft finds often starts with three categories:
- Soft accents such as pillows, throws, and curtains
- Wall statements such as art, mirrors, and shelving decor
- Small furniture touch-ups such as painted legs, handles, or trim
By layering these elements and repeating colors or textures in at least three spots around the room, you create a deliberate, designer-like feel. In my experience, the repetition of color and texture is the single most important move for turning random bargains into a cohesive interior.
Planning Stylish Decor On A Tight Craft Budget
Before buying a single clearance stencil or discounted ribbon spool, map out your budget with real numbers. Decide on a total maximum and break it down into categories like textiles, wall decor, storage, and lighting. This structure prevents impulse buys that eat up your funds and ensures you have enough supplies to finish each project, not just start it. It also makes every discounted craft purchase feel like a strategic move rather than a gamble.
Based on my work with small-space and rental clients, a realistic starter breakdown for a tight budget might look like:
- 40 percent on textiles and soft decor
- 30 percent on wall art and accents
- 20 percent on storage and organization details
- 10 percent on lighting touches such as shades and decorative cords
This ratio keeps comfort and visual impact at the front of the plan. Textiles are usually the fastest way to shift the mood of a room, while well-placed wall decor adds personality without structural changes. When planning, check what tools and leftover craft supplies you already own. Often, reusing existing paint, brushes, or glue saves more money than any coupon.
From hands-on projects, I have found that a written shopping list is just as important as the budget number. List the specific discount craft items you need, such as three frames to paint, two rolls of painter’s tape, or four foam brushes. Bring measurements of your wall spaces, shelves, and windows to avoid buying pieces that are the wrong size. This planning approach turns the hunt for discount craft supplies into a focused, efficient part of your decor strategy.
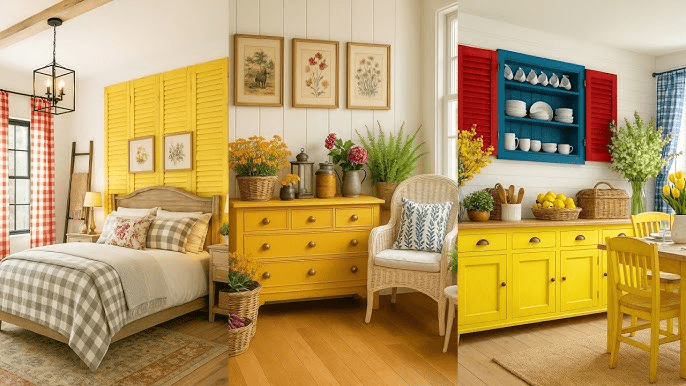
Upcycling Thrifted Decor With Discount Craft Supplies
Thrift stores and flea markets are treasure troves when paired with low-cost craft materials. A scratched picture frame, dated lamp base, or plain wooden tray can become a stylish centerpiece with basic upgrades. Look for solid construction first, since structural repairs can be more complex and costly than cosmetic changes. Scratches, chipped paint, or old fabric are usually easy to fix with common craft supplies.
For example, a simple thrifted frame can be refreshed using:
- Discount acrylic paint or spray paint in a modern color
- Inexpensive painter’s tape for clean geometric lines
- Peel-and-stick wallpaper scraps for the inner mat
In my experience working on budget decor makeovers, combining one thrifted base item with two or three discount craft upgrades creates the best balance of quality and savings. The existing piece offers structure and shape, while craft supplies handle color, pattern, and personality. Always allow proper drying time for paints and sealers to avoid smudges and damage. Most water-based acrylic paints are dry to the touch in about one hour, but should cure for at least 24 hours before heavy use.
Upcycled decor can include:
- Lamps with new shades wrapped in discounted fabric or trimmed with clearance ribbon
- Side tables refinished with clearance contact paper or varnish-safe stencil designs
- Plain vases updated with twine wrapping, metallic paint, or textured paste
For safety, ensure any electrical items like lamps are in good working order and meet your local electrical standards before decorating them. When in doubt, have wiring checked by a qualified professional. The crafting should never interfere with vents, bulbs, or moving parts that generate heat.
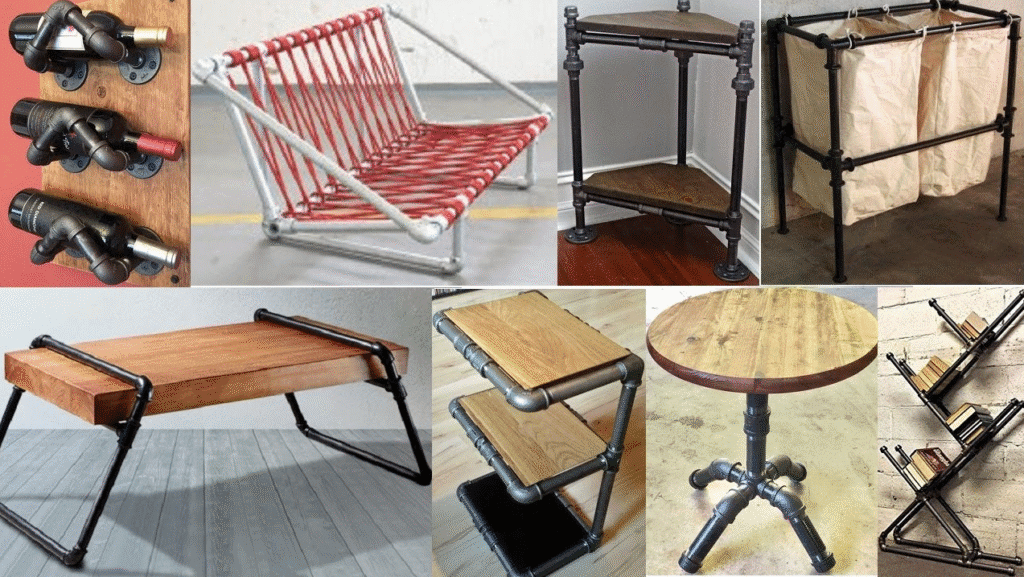
High-Impact Wall Decor Using Cheap Craft Materials
Wall decor provides huge visual impact, and discount craft supplies make large-scale statements possible on a tiny budget. Large blank walls can feel cold or unfinished, but you do not need expensive gallery art to change that. Instead, think in terms of clusters, grids, and oversized pieces built from affordable components like foam board, poster board, or clearance frames.
In my experience designing wall layouts, three strategies work especially well for budget decor:
- Grid galleries with identical frames painted one unified color
- Organic gallery walls mixing printed photos, small canvases, and craft pieces
- Oversized panels created from foam board, fabric, and a staple gun
Discount fabric remnants or even flat sheets can become art when wrapped tightly around foam board or stretched over inexpensive canvas frames. Use a staple gun or strong craft glue on the back side, then hang with removable adhesive strips to protect rental walls. Always follow the weight limits on adhesive products and avoid hanging heavy items where they could fall on beds or seating.
For detailed pieces, clearance stencils and inexpensive acrylic paints are invaluable. You can:
- Stencil repeating patterns on blank canvases
- Add borders to plain frames or mirrors
- Create custom typography art with letter stencils
Based on real-world testing, I recommend using painter’s tape to secure stencils and prevent paint bleed, and choosing matte or satin paints for wall art to avoid distracting glare from lighting. If you are creating large pieces, keep designs simple and bold so they read clearly from across the room.
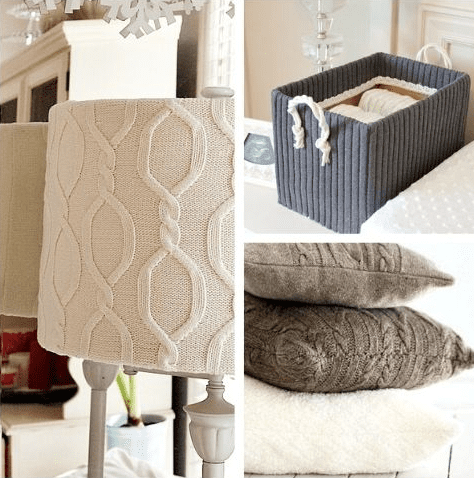
Textiles, Pillows, And Soft Decor For Less
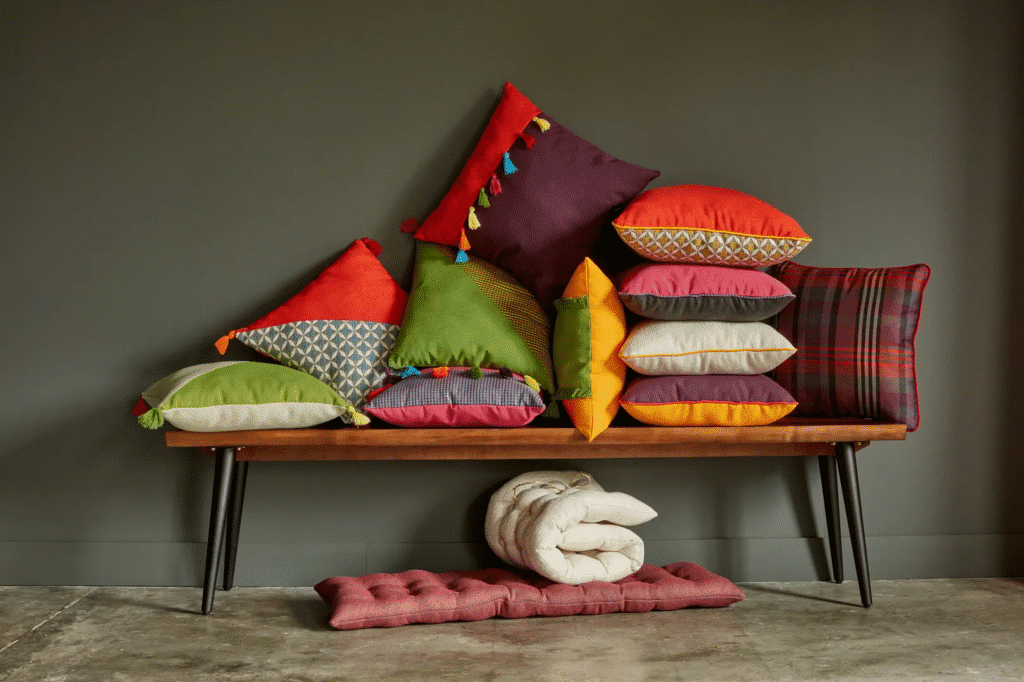
Textiles are one of the most powerful tools for changing the feel of a room, and they also absorb sound and add physical comfort. Discount craft stores often carry fabric remnants, clearance yarn, and affordable stuffing that can be used to sew or assemble decorative pillows and cushions. Even if you do not sew, fabric glue and iron-on tape can help you create simple covers from flat pieces of fabric.
A practical budget decor strategy is to standardize your pillow insert sizes such as 18 by 18 inches or 20 by 20 inches. That way, you can swap out covers seasonally without buying new inserts. In my experience working with small living rooms, placing the largest pillows at the back and one smaller accent pillow in the front creates a designer-style layered effect without overcrowding the sofa. Aim for a mix of solid, textured, and patterned pillows in a consistent color story.
Consider these low-cost textile ideas:
- Use discounted fleece or knit fabric to make cozy throws with simple folded hems
- Turn clearance shower curtains or tablecloths into statement curtains
- Wrap inexpensive foam or old dining chair seats with new fabric and a staple gun
When choosing fabrics, check fiber content. Cotton and linen blends are often breathable and comfortable for most climates, while synthetic fibers like polyester can be more stain resistant but may feel warmer against the skin. For items near heat sources or kitchen areas, avoid highly flammable materials and never drape fabric near open flames, stovetops, or heaters.
Discount Craft Storage Solutions That Look Designer
Storage is part of decor, and clutter control can dramatically improve how stylish a space feels. Discount craft supplies, especially baskets, crates, and plain boxes, are ideal starting points for custom storage features. When these pieces are coordinated and labeled, they can look purposeful rather than improvised. Finished correctly, they can mimic designer organization systems at a fraction of the cost.
From hands-on work with clients in small apartments, I have found that stacking storage vertically and keeping visible items in one or two colors reduces visual noise. For example, buy a mix of clearance wicker baskets and inexpensive cardboard boxes, then unify them with matching paint or labels. Stencil labels using discount alphabet stencils, or print simple tags and attach with twine or ribbon. Grouping storage by activity such as crafting, gaming, or office supplies makes daily life smoother as well as neater.
Here are some stylish budget-friendly storage hacks:
- Wrap plain cardboard boxes in discounted contact paper or fabric
- Spray paint mismatched metal baskets one cohesive color like matte black or soft white
- Create a pegboard organization wall with clearance hooks and small containers
For safe and long-lasting results, choose paints or adhesives that are compatible with the material. Not all paints adhere well to plastic or glossy coatings without a primer. If you plan to store food or children’s items, avoid painting the interior surfaces and check product labels for any safety warnings. Carefully follow ventilation instructions when using spray paint or strong adhesives.
Lighting Upgrades With Affordable Craft Extras
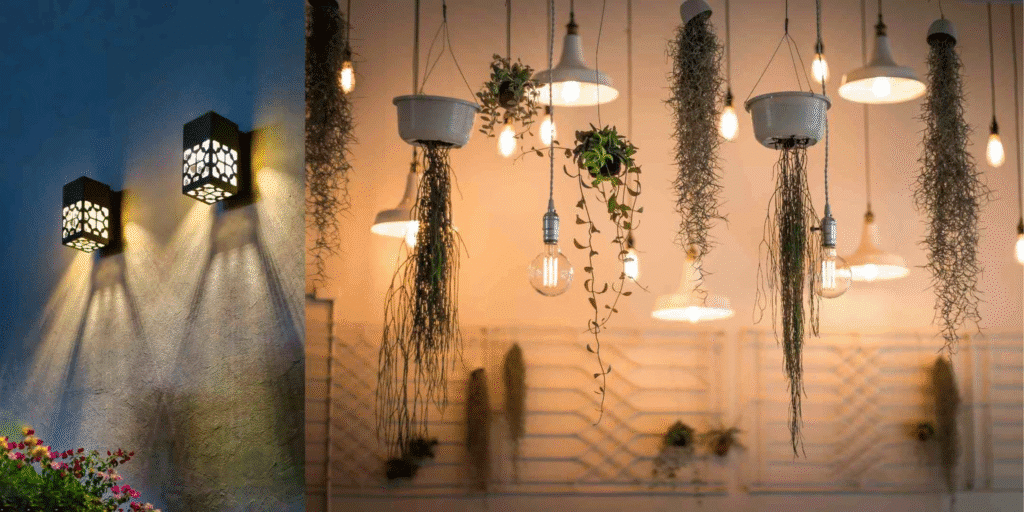
ighting influences both the function and mood of a room, and small DIY changes can make generic fixtures feel unique. While electrical work itself should be handled by a licensed professional when wiring is involved, you can safely enhance existing lamps, string lights, and shades using low-cost, non-electrical craft supplies. The goal is to improve the look and diffusion of light without altering cords or sockets.
Based on real-world testing of decor setups, soft white bulbs around 2700K to 3000K color temperature generally create a warm, inviting glow suitable for living rooms and bedrooms. Cooler temperatures such as 4000K can feel more energizing and work better for task areas like kitchens and desks. Combine that with a decorated shade or diffuser to achieve both brightness and style. For example, a plain drum shade can be transformed with:
- Discount trim or ribbon along the top and bottom edges
- Fabric paint patterns applied in light layers
- Stenciled motifs that echo other elements in your decor
Fairy lights and string lights are another budget decor staple. You can thread them through inexpensive curtain panels, glass jars, or around wall art, but always follow the manufacturer’s safety instructions regarding heat and placement. Avoid covering bulbs with flammable materials and keep cords clear of walkways. In my experience, using battery-operated LED lights inside decor items like jars or lanterns reduces heat risk and makes placement much easier.
When working with candles, consider flameless LED candles for safety, especially in homes with children or pets. Discount craft supplies such as glass beads, sand, or small stones can be used to fill clear containers and stabilize LED candles for a polished look. These fillers also help reflect light softly without introducing fire hazards or heavy heat sources.
Stylish DIY Decor Projects On A Tight Budget
A tight budget is often the best spark for creativity. When you focus on a few key DIY decor projects that deliver high visual impact, your discount craft supplies go further and your home feels more intentional. The most effective projects usually:
- Update items you already own
- Use repeatable techniques across different rooms
- Rely on simple tools like basic scissors, glue, and brushes
From hands-on projects over the years, I have seen three categories produce the most noticeable upgrades: statement trays, coordinated vases, and custom art. For instance, a simple serving tray can become a coffee table focal point with contact paper, paint, or a collage sealed under clear varnish suitable for decor use. Always check that any sealant is fully cured before placing objects on top to prevent sticking or damage.
Try these budget DIY project ideas:
- Create a set of matching vases by painting thrifted glass bottles with chalk paint
- Assemble a “designer” coffee table stack with painted boxes and small decor objects
- Build a seasonal centerpiece using faux greenery, clearance ribbon, and a low basket
Check product labels when combining materials. Some adhesives and paints are not suitable for surfaces that touch food or drink, so reserve these combinations for purely decorative pieces. For projects that may be handled frequently such as trays or coasters, add a protective topcoat rated for the relevant material to improve durability.
Maintaining Your Budget Decor For Long-Term Style
Once your stylish budget decor is in place, maintenance keeps it looking intentional instead of temporary. Dusting, gentle cleaning, and occasional touch-ups cost very little but pay off in a more polished appearance. Develop a simple monthly checklist, especially for items made from wood, fabric, and painted surfaces, as these show wear more quickly.
In my experience following up with clients months after a makeover, the homes that still look fresh are the ones where people schedule small upkeep moments. For example:
- Vacuum or shake out throw pillows and blankets to remove dust and hair
- Wipe painted surfaces with a soft, slightly damp cloth and mild soap if needed
- Check adhesive hooks or strips and replace any that loosen to avoid sudden falls
When washing DIY textiles, pay attention to fabric type. Cotton can usually be machine washed on gentle cycles, while delicate synthetics or embellished pieces may require hand washing or spot cleaning. Always test cleaning products on a small, hidden area first to avoid staining or fading. Keep a small kit of leftover paint, glue, and patch materials so you can quickly repair chips or loose embellishments without redoing entire projects.
By caring for your pieces, you extend the life of every clearance find and budget craft supply you invested in. This long-term mindset turns low-cost decor into a sustainable, evolving style rather than a short-lived experiment. You can refresh accents seasonally with minimal purchases, reusing your best techniques and materials again and again.
Conclusion
Stylish budget decor is less about the amount you spend and more about the creativity, planning, and careful execution you bring to each project. With discount craft supplies, thrifted bases, and a clear design vision, you can build a cohesive, comfortable home that reflects your taste without straining your wallet.
A smart approach combines planning, selective shopping, and thoughtful upcycling. By choosing a color palette, mapping out a realistic budget, and focusing on high-impact zones like walls, textiles, storage, and lighting, you turn clearance items into coordinated decor assets. From hands-on work with clients, I have seen that confidence grows with each project, and soon even small tweaks like a new pillow cover or painted frame feel natural.
Keep safety and durability in mind when working with paints, adhesives, and lighting, and read labels carefully to understand appropriate use. Maintain your created pieces with simple cleaning and occasional touch-ups so they continue to look intentional over time. With this combination of creativity, care, and craft-savvy shopping, stylish budget decor becomes not just a one-time makeover, but an ongoing, enjoyable way to live beautifully for less.

Maira Lindey is a home decor enthusiast who loves transforming ordinary spaces into warm, stylish havens. Through her writing, she shares simple, creative ideas that help people make their homes both beautiful and comfortable. Her approach combines aesthetic charm with practical solutions for everyday living.
With years of experience experimenting with colors, textures, and layouts, Maira enjoys guiding readers to express their personality through home design. She believes that even small changes can have a big impact, and she focuses on tips that are easy to implement without overwhelming the space or the budget.
Beyond decorating, Maira finds inspiration in nature, art, and everyday life. She encourages her readers to embrace creativity and make spaces that feel uniquely theirs, blending functionality with style in ways that are both inviting and livable.