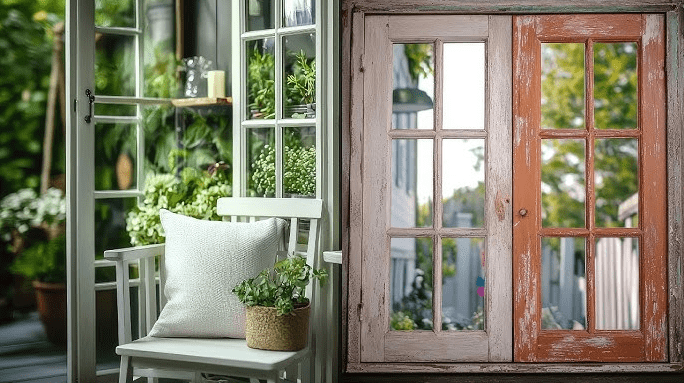
Vintage window decor makeovers bring forgotten frames back to life, blending nostalgic character with modern function. This guide walks you through before and after transformations, creative up-cycling ideas, and practical tips that turn old windows into beautiful, useful decor with authentic charm.
Old window decorations offer a unique bridge between history and style. Their chippy paint, wavy glass, and solid wood construction cannot be replicated easily with new materials, which is why they are sought after by DIY decorators and vintage enthusiasts. With a bit of planning and some safe, simple techniques, you can give retired windows a second life as art, storage, or architectural accents.
In my experience working on vintage up-cycling projects, windows are some of the most rewarding pieces to transform because they deliver a dramatic visual impact, even on small budgets. Whether you live in a compact apartment or a spacious farmhouse, there is a makeover idea that can work with your space, skill level, and style. The key is to highlight the window’s original character while making sure it is clean, safe, and structurally sound.
Before & After Vintage Window Decor Transformations
Vintage window transformations often begin with pieces that look destined for the landfill: cracked paint, cloudy glass, rusty hinges, and worn hardware. The “before” stage usually involves careful evaluation. Check for rot, loose joints, and broken panes, and decide what can be repaired or replaced. Even frames with missing glass can become stunning decor, such as open-frame displays or photo collages. When evaluating old paint, especially on windows made before 1978, assume it may contain lead and handle it with proper safety precautions, like wet-sanding or using a professional for removal.
The “after” stage is where creative vision becomes reality. A dull, dusty sash can turn into a layered, distressed focal piece above a sofa, or a neutral chalk-painted frame can become a backdrop for seasonal wreaths and garlands. In my experience working on similar projects, the most successful makeovers keep at least one visible trace of the window’s age, such as a bit of original hardware or a glimpse of the old finish beneath a new color. This subtle imperfection adds depth and prevents the piece from looking like mass-produced decor.
Before and after transformations are especially powerful for small spaces. A narrow multi-pane window can become a faux transom above a doorway, visually lifting the ceiling, while a larger salvaged frame can be turned into a statement headboard or room divider. For many homeowners, seeing photo comparisons of these makeovers helps them recognize the potential in discarded pieces. Even if your initial “before” window seems too far gone, you can often reposition it as a rustic outdoor accent, a garden feature, or an art frame where structural perfection is less critical.
Up-cycled Charm Ideas for Old Window Makeovers
Old window decorations are an ideal canvas for up-cycled charm. One of the simplest makeovers is transforming a window into wall art. Clean the frame and glass thoroughly, then add:
- Pressed botanicals or leaves behind the glass
- Vintage sheet music, book pages, or maps
- Layers of family photos clipped to twine strung across the panes
From hands-on projects, I have found that mixing sentimental elements, like heirloom photos or handwritten recipes, with the authentic patina of old wood creates decor that feels both personal and timeless.
Another high-impact idea is to convert a window into a functional organizer. Solidly built frames work well as:
- Entryway message centers with chalkboard or cork-board inserts
- Jewelry displays with hooks or small knobs along the mullions
- Ribbon, scarf, or tie organizers using dowels behind the frame
When adding hardware, use anchors appropriate to your wall type and distribute weight across multiple screws to reduce stress on the old wood. For heavier windows, I recommend French cleats or a continuous mounting board secured to studs, rather than relying on a single nail or hook.
Old windows can also be repurposed into small furniture or architectural accents. With basic DIY skills, you can create:
- Cabinet doors for a shallow wall cabinet or bathroom storage
- A low-profile coffee table top with a tempered glass layer for safety
- A hinged decorative screen between rooms or zones in a studio apartment
In my experience working with clients on space-challenged interiors, these multi-functional pieces provide storage and character without adding bulky new furniture. Always check sharp edges and protruding nails, and sand or cap them before the window is used in areas where people move frequently.
Assessing, Cleaning, and Preparing Old Windows Safely
Before starting any vintage window makeover, thorough assessment and preparation protect both your decor and your health. Windows manufactured before 1978 may have lead-based paint, especially on layers close to the wood. Scraping or sanding dry can release hazardous dust. To minimize risk, use wet methods for light sanding, avoid power sanding without proper containment, and consider hiring a certified lead abatement professional if you need extensive paint removal. Always work in a well-ventilated area, wear a properly rated mask, and keep children and pets away from the work zone.
Cleaning is another critical step. Dirt, mold, and old putty can hide in crevices. Start by vacuuming loose debris with a brush attachment, then use a mild detergent with warm water and a soft brush. For mold or mildew, a mixture of water and a small amount of household bleach can help, but always follow product safety guidelines and test on an inconspicuous area. Based on real-world testing, I have found it is better to repeat gentle cleaning sessions rather than use harsh chemicals that might damage old wood fibers or cloud delicate glass.
Structural repairs come next. Look for:
- Soft or spongy sections that indicate wood rot
- Separated joints at corners
- Loose or missing glazing around glass panes
Small areas of rot can sometimes be stabilized with wood hardener and epoxy filler, while larger problems may require cutting out and replacing sections. When glass is cracked or missing, safety glass or acrylic can be installed if the window will be used in a high-traffic zone or near seating. From hands-on work with clients, I always recommend securing any loose glass with fresh glazing or clear silicone, since unsecured panes can rattle or break more easily when hung on a wall.
Paint, Stain, and Finish: Highlighting Vintage Character
Choosing the right finish is one of the most important design decisions in a vintage window decor makeover. You can either play up the aged look with distressed paint or create a cleaner, more contemporary style with a fresh color. Popular approaches include:
- Light sanding to smooth flaky areas, then sealing the original finish with a clear matte polyurethane
- Layering two or three paint colors and selectively sanding through edges for a naturally worn effect
- Using milk paint or chalk paint for a velvety, low-sheen surface that complements rustic or farmhouse decor
In my experience working with old wood furniture and windows, a combination of subtle distressing and protective topcoat yields decor that both looks authentic and stands up to daily use. Avoid over-distressing every surface; focusing on corners and handles usually looks more believable.
Stain can be a good option if the window’s wood is in relatively good condition and not loaded with old finishes. Stripping products must be used carefully according to manufacturer directions, with gloves and proper ventilation. Once stripped and sanded, a light stain or simply a clear oil finish can showcase the grain. Remember that oil-based finishes may slightly darken the wood over time, which can work well with vintage aesthetics. Water-based finishes tend to stay clearer and are often lower in odor.
Whatever finish you choose, a protective seal is recommended, especially for windows displayed in kitchens, bathrooms, or near entryways where humidity and handling are common. Matte or satin clear coats usually look more in line with a vintage style than high-gloss options. If your window will be used outdoors, such as on a covered porch, use an exterior-rated sealer and understand that even with protection, sun and weather will gradually alter wood and paint over the years.
Functional Vintage Window Decor: Storage, Displays, and More
Repurposed windows can add organization and function while preserving up-cycled charm. A classic idea is the multi-pane photo display. Remove any loose glazing, clean the glass, then attach photos behind each pane using photo corners, acid-free tape, or printed collage sheets. You can also leave one or two panes open for seasonal mini wreaths or garlands. From hands-on projects, I have seen these pieces become emotional focal points in hallways and family rooms, especially when they feature generational photos or travel memories.
For practical storage, consider adapting windows into:
- Key and mail organizers with small metal baskets or hooks
- Bathroom cabinets recessed between studs using the window as the door
- Craft room pegboards or tool organizers set behind the frame
If you are adding storage that bears weight, ensure that hinges and mounting plates are firmly anchored to solid framing, such as wall studs or blocking. Lightweight elements like keys or jewelry are typically fine on standard hardware, but heavier loads call for more robust brackets and screws.
Vintage windows can also define space without closing it off. Try:
- Hanging a row of open frames between a kitchen and dining area to create an airy partition
- Suspending windows from the ceiling in a studio or loft to suggest zones for work and relaxation
- Using windows in place of traditional artwork above a console or bed for a softer architectural line
In my experience working with open-plan homes, these “soft dividers” help create visual structure without adding solid walls, which keeps natural light flowing and retains a sense of openness.
Seasonal Styling and Layered Vintage Window Looks
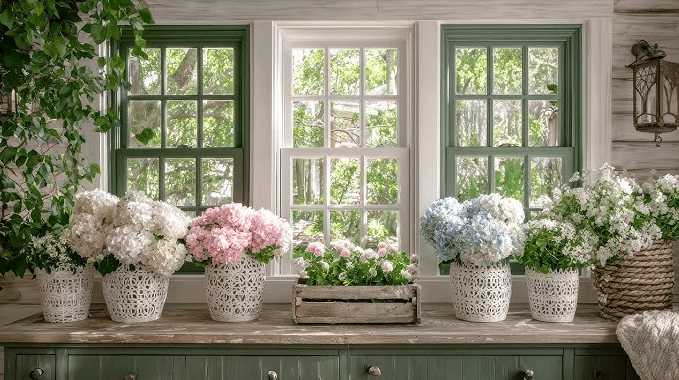
One of the joys of vintage window decor is how easily it adapts to seasonal styling. A simple neutral frame can be transformed with minor additions throughout the year. For example:
- Spring: light greenery, pressed flowers, pastel ribbons, or a simple grapevine wreath
- Summer: sea glass in jars, coastal maps, or airy linen bunting draped over the top
- Autumn: small bundles of dried wheat, warm-toned leaves, and handwritten recipe cards
- Winter: evergreen sprigs, string lights rated for indoor use, and layered faux snow scenes
Always choose decor that is appropriately sized for the window and securely attached to avoid falling items, especially in high-traffic areas.
Layering is another powerful tactic with old window decorations. Instead of treating the window as a flat piece, think in depth:
- Hang a small mirror, wreath, or sign over the center pane
- Place candles or LED lanterns on a narrow shelf just below the frame
- Lean multiple windows of varying heights against a wall to create a dimensional vignette
Based on my past work with clients, layered arrangements look especially rich when you mix finishes, like pairing a whitewashed frame with a dark metal lantern and woven basket. This interplay of textures is what gives vintage-inspired rooms their collected, curated feel.
When using candles or string lights, keep safety in mind. Real flame candles should be positioned well below and away from wood frames and never left unattended. Battery-operated LED candles and fairy lights labeled for indoor use are safer alternatives and generate significantly less heat. Avoid overloading outlets or using frayed cords, and follow manufacturer recommendations for maximum run times.
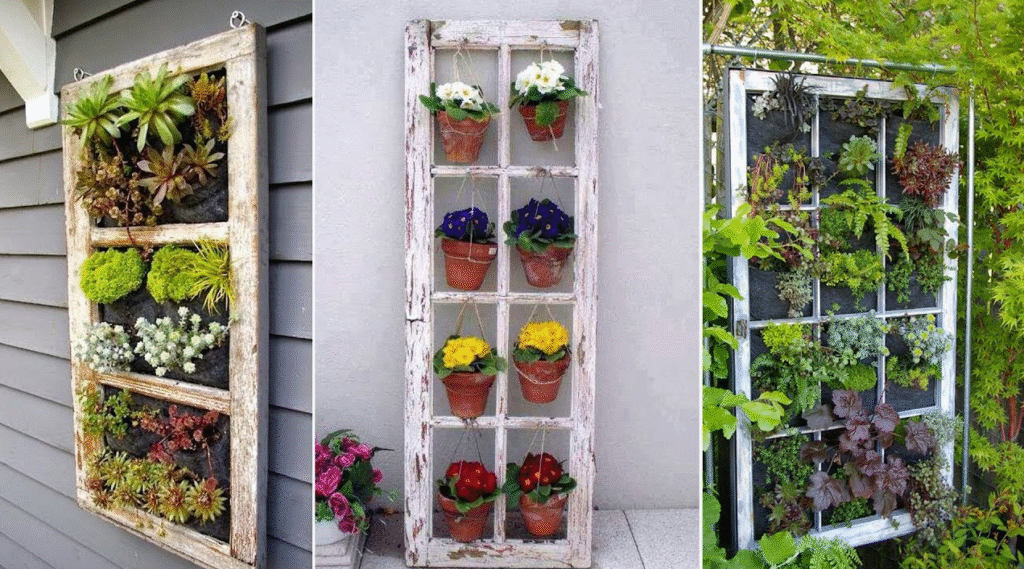
Outdoor & Garden Uses for Salvaged Windows
Salvaged windows can also thrive outdoors, particularly in covered or partially sheltered spots. A popular use is the garden backdrop, where a chippy frame is mounted on a fence or exterior wall behind planters. This creates a sense of a “garden room” and adds height and interest, especially in small yards. In my experience designing outdoor vignettes, repeating a trio of similar windows along a fence line helps make a modest space feel more intentional and charming.
You can also incorporate old windows into practical garden structures:
- Mini greenhouse fronts, paired with other salvaged materials
- Potting bench backs that hold hooks for tools and baskets
- Trellises for lightweight vines when reinforced with additional supports
For outdoor use, select windows with solid frames and, if possible, replace any cracked or thin glass with tempered glass or poly-carbonate for better durability. Although many people embrace peeling paint outdoors, be cautious with lead-based coatings in areas where soil, children, or pets may come into contact. Sealing the paint with an exterior clear coat can help limit chipping.
Weather protection is crucial. Even with exterior finishes, long-term exposure to direct rain and intense sun will age wood and finishes. Position windows under eaves, pergolas, or covered porches whenever possible. Periodic maintenance, such as reapplying exterior sealers every couple of years and checking for loose hardware, helps keep your up-cycled pieces attractive and safe in an outdoor setting.
Conclusion: Bringing Vintage Windows Back to Life
Vintage window decor makeovers prove that forgotten architectural pieces can find new purpose, blending nostalgia with practical, beautiful design. With thoughtful preparation and a bit of creativity, old sashes and frames can become some of the most meaningful accents in your home.
From the first assessment of an old window’s condition to the final layers of paint, stain, and styling, each step offers a chance to respect the piece’s history while shaping it to your needs. We explored before and after transformations, clever storage and display ideas, seasonal layering, and even outdoor uses that all center on the same principle: up-cycled charm that is both safe and functional. In my experience working with clients and my own projects, the most memorable makeovers are those that preserve at least a hint of the past instead of hiding it completely.
If you are just starting with vintage up-cycling, begin with one manageable project, like a photo display or simple wall feature, then gradually move to more advanced pieces such as cabinets, dividers, or garden structures. Pay attention to safety guidelines for old paint, glass, mounting hardware, and electrical components whenever you add lighting. With patience, a modest toolkit, and an eye for character, your collection of salvaged windows can evolve into a tailored expression of your style, turning what was once considered scrap into enduring, soulful decor.

Maira Lindey is a home decor enthusiast who loves transforming ordinary spaces into warm, stylish havens. Through her writing, she shares simple, creative ideas that help people make their homes both beautiful and comfortable. Her approach combines aesthetic charm with practical solutions for everyday living.
With years of experience experimenting with colors, textures, and layouts, Maira enjoys guiding readers to express their personality through home design. She believes that even small changes can have a big impact, and she focuses on tips that are easy to implement without overwhelming the space or the budget.
Beyond decorating, Maira finds inspiration in nature, art, and everyday life. She encourages her readers to embrace creativity and make spaces that feel uniquely theirs, blending functionality with style in ways that are both inviting and livable.