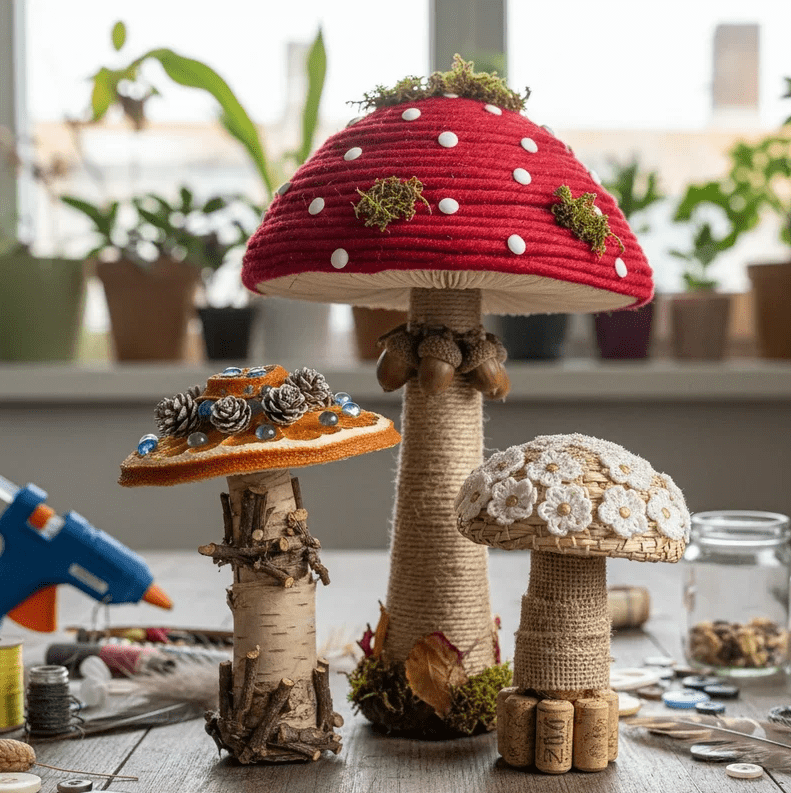
Clay mushroom decor is a charming way to bring woodland magic into a cozy cottagecore home, combining nature-inspired shapes with the tactile warmth of handmade clay. This guide walks through practical, beautiful ideas for DIY mushroom projects that suit both boho and cottagecore interiors.
Clay mushroom decor blends nostalgic storybook charm with modern boho sensibilities, making it a perfect fit for anyone curating a whimsical, slow-living space. With a few simple tools and some air dry or polymer clay, you can create enchanting accents that look curated rather than cluttered. The key is to focus on texture, color, and placement so your mushrooms feel intentional and artful.
From miniature toadstools on open shelving to softly glowing mushroom lamps, clay fungi can work in every room. You do not need advanced sculpting skills to start, just a bit of patience and a willingness to embrace imperfect, organic shapes. In my experience working on small-space styling, these tiny details often become the most photographed parts of the home.
Whimsical Clay Mushroom Decor for Cottage-core Homes
Cottagecore decorating centers on comfort, nature, and nostalgia, and clay mushrooms slip into that aesthetic very naturally. Their rounded shapes, speckled caps, and earthy colors mimic the look of real forest fungi without needing any maintenance. When crafted by hand, each mushroom becomes slightly unique, which enhances that lived-in, collected-over-time feeling that cottagecore homes celebrate.
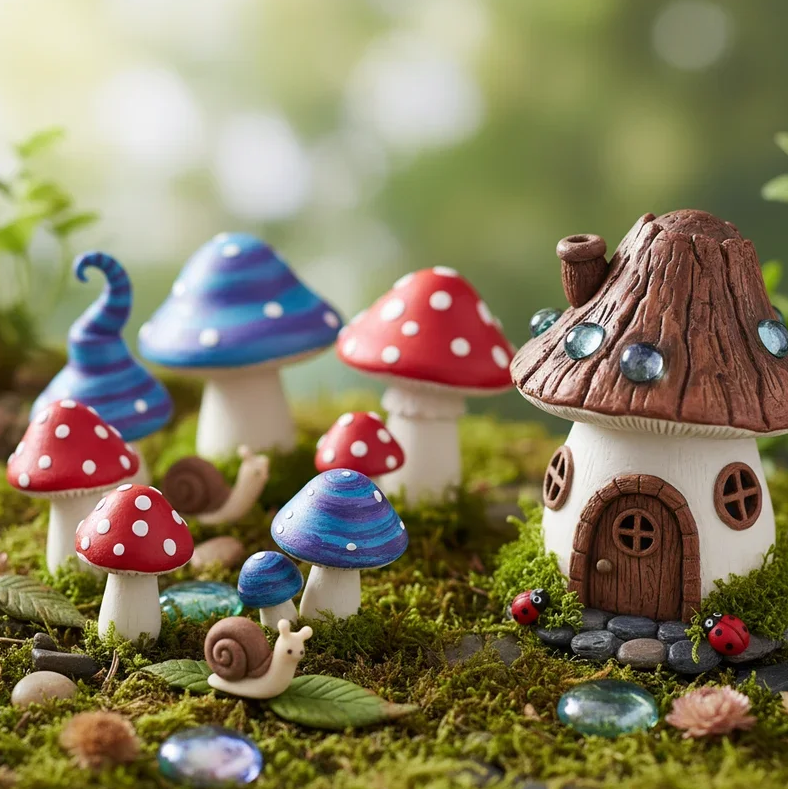
To keep things cohesive rather than kitschy, it helps to think in terms of a color palette and a few repeating forms. Soft creams, terracotta, moss green, muted rust, and warm browns blend easily with wooden furniture and linen textiles. Based on real-world styling for clients, I have found that repeating one or two mushroom shapes in different sizes keeps the decor calm instead of chaotic.
You can style clay mushrooms across the home in subtle ways:
- Clustered on open shelves with vintage books
- Tucked into windowsill herb gardens
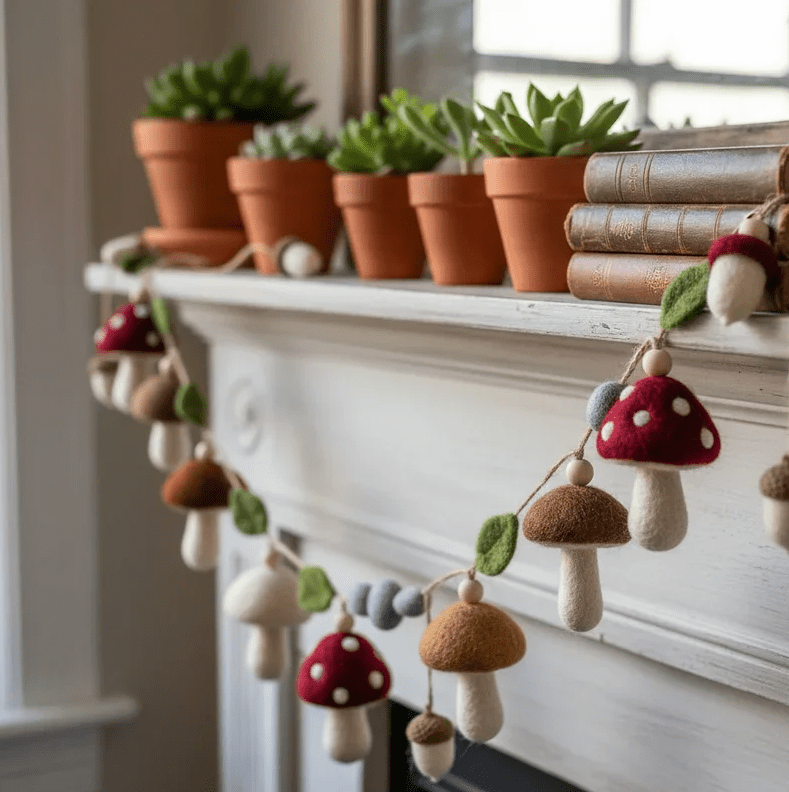
- Scattered on a mantel alongside candlesticks and framed art
Avoid placing them on every visible surface; instead, choose two or three key vignettes where they can shine as focal cottagecore accents.
Handcrafted Fungi Accents to Elevate Cozy Boho Vibes
Boho interiors favor layered textures, plants, woven baskets, and artisanal pieces, which makes handcrafted clay mushrooms a natural fit. Rather than bright, cartoony colors, opt for boho-friendly hues such as ochre, dusty rose, clay red, and off-white. A matte or satin finish usually feels more elevated than a high-gloss glaze in boho rooms.
From hands-on projects, I have found that mixing clay mushrooms with macrame, rattan, and trailing plants creates a visually rich composition without feeling heavy. For example, a hanging shelf with a small philodendron, a beaded tassel, and two clay mushrooms can become a captivating mini altar to nature. The combination of organic shapes and handmade texture helps the decor feel curated and soulful.
When designing for cozy boho spaces, try these layout ideas:
- A low coffee table tray with:
- Two or three mini mushrooms
- A small crystal cluster
- A ceramic incense holder
- A rattan wall shelf with:
- A clay mushroom perched beside a framed botanical print
- Bedside decor featuring:
- A mushroom trinket dish paired with a linen-covered journal
This layering approach keeps the mushrooms integrated into the style rather than looking like seasonal novelties.
- A mushroom trinket dish paired with a linen-covered journal
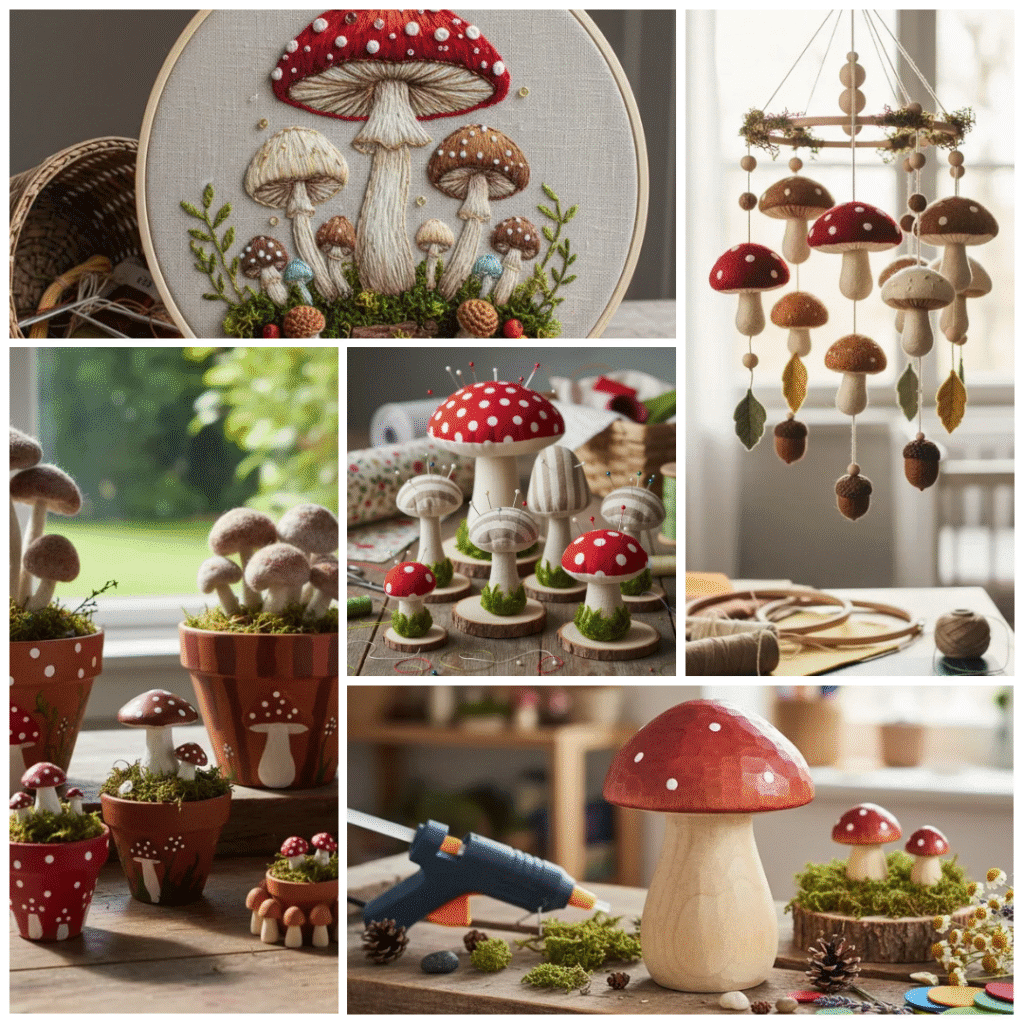
Choosing the Right Clay, Tools, and Finishes
The choice of clay significantly affects durability, finish, and where you can safely display your mushrooms. Air dry clay is user friendly and ideal for beginners, though it should not be exposed to constant moisture. Polymer clay requires baking in a home oven yet offers more strength for small, detailed mushrooms. If you have access to a kiln, stoneware or earthenware clay can produce heirloom-quality pieces, but that step is optional for most DIYers.
In my experience teaching beginner workshops, the best starting kit includes:
- A basic set of wooden or metal sculpting tools
- A small rolling pin
- A craft knife or blade
- Fine-grit sandpaper
- Acrylic paints or underglaze and a soft, synthetic brush
You can create charming, rustic mushrooms even with just your hands and a butter knife, but tools help refine shapes and textures.
Finishes are crucial for both aesthetics and longevity:
- Use non-toxic acrylic paint for air dry or polymer clay pieces, especially if they might be near food.
- Seal with a matte water-based varnish for a natural look, or a satin sealer for slight sheen.
- For bathroom or kitchen decor, prioritize a durable sealer and keep items away from direct water contact.
Note that even sealed clay is not fully waterproof, so avoid long-term submersion and wipe spills promptly to prevent damage.
Sculpting Charming Clay Mushrooms Step by Step
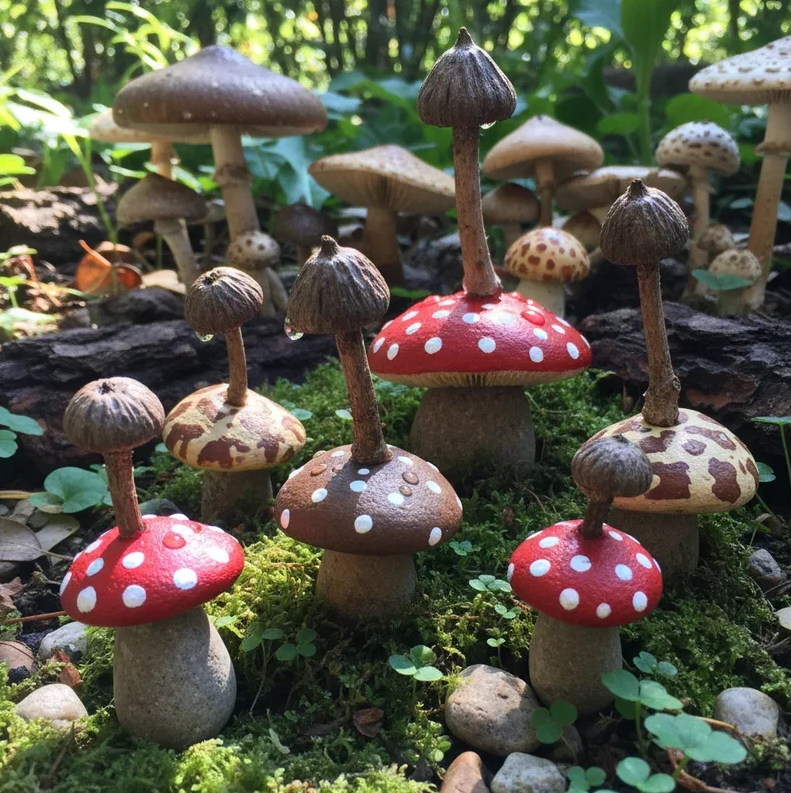
A classic mushroom form starts with two parts: a stem and a cap. For most small cottagecore decor pieces, aim for mushrooms between 1 and 3 inches tall, which are easier to sculpt and style. Roll a cylinder for the stem, then gently taper the top to support the cap. For the cap, shape a ball, then press it into a dome, flattening the underside just enough to sit comfortably on the stem.
From hands-on work with polymer clay, I have found it helpful to assemble stems and caps while the clay is still soft, using a bit of slip (water mixed with clay) for air dry or a gentle twist-and-press motion for polymer. You can add subtle gill lines underneath the cap with a needle tool or toothpick. These small details read beautifully once painted, especially in soft lighting.
To keep your mushrooms varied and natural looking:
- Make some stems straight and others gently curved.
- Vary heights so clusters have visual rhythm.
- Add texture by:
- Stippling the caps with a brush handle
- Carving tiny dimpled spots
- Gently pressing lace or linen into the surface before it dries
Allow air dry clay to cure fully according to package instructions, typically 24 to 72 hours, in a well-ventilated space away from direct heat sources. For polymer clay, follow the manufacturer’s recommended temperature and baking time, usually around 265 to 275°F (129 to 135°C) for 15 to 30 minutes per quarter inch of thickness.
Enchanting Color Palettes and Painting Techniques
Color is where your clay mushroom decor truly comes to life. For cottagecore boho interiors, earthy and muted tones tend to integrate more gracefully than neon reds. Classic toadstools with brick red caps and creamy stems can look beautiful if you soften the red with a bit of brown or burnt sienna. Sage green, mushroom beige, dusty rose, and ochre all work exceptionally well with natural woods and plants.
Based on real-world testing of finishes, I recommend:
- Starting with a thin base coat of off-white or light beige on stems.
- Adding layered washes of color on caps rather than a single flat hue.
- Using a dry brush technique to highlight raised textures on the caps and stems.
Paint light-colored spots after the cap is fully dry to avoid muddying the tones. If you are aiming for a vintage, storybook feel, lightly sand edges before sealing to create a softly worn look.
Try these palette concepts for different vibes:
- Woodland classic:
- Deep red caps
- Creamy stems
- Tiny beige freckles
- Mossy fairy ring:
- Sage and olive caps
- Warm gray stems
- Soft brown speckling
- Boho sunset:
- Terracotta and dusty rose caps
- Pale sand stems
- Golden ochre accents
Always complete your painting with a suitable clear sealer. For indoor decor, a water-based matte varnish is usually sufficient, though pieces placed in bright windows should be kept out of direct UV for prolonged periods to reduce color fading.
Styling Clay Mushrooms on Shelves, Mantels, and Tables
Where you place your clay mushrooms matters as much as how you sculpt them. Instead of scattering them uniformly, treat them like tiny sculptures that help anchor styled vignettes. On open shelving, group mushrooms with items that echo their shapes or themes: curved pottery, botanical prints, and bundles of dried flowers all work well. Keeping some negative space around each grouping prevents visual clutter.
In my experience working on small apartment styling, the most effective displays use the rule of three. Arrange three mushrooms of different heights near a stack of books or beside a candle holder. The eye reads this as intentional decor rather than random trinkets. Changing the grouping slightly with the seasons keeps the room feeling fresh while still grounded in your cottage-core aesthetic.
Consider these styling ideas:
- Living room:
- A tray on the coffee table with a few mushrooms, coasters, and a bud vase
- Bedroom:
- Mushrooms on the nightstand next to a soft-glow lamp and a favorite novel
- Entryway:
- A shallow dish with keys and a tall mushroom tucked behind, creating a welcoming focal point
Avoid placing clay decor where it can be easily knocked to the floor, especially in homes with pets or small children. Use non-permanent museum putty under larger mushrooms on unstable surfaces if needed for extra security.
- A shallow dish with keys and a tall mushroom tucked behind, creating a welcoming focal point
Cozy Corners: Mushroom Terrariums, Planters, and Fairy Nooks
Clay mushrooms shine when integrated into mini worlds like terrariums and fairy gardens. For enclosed glass terrariums, it is important to note that constant moisture can soften air dry clay over time, so polymer or sealed ceramic mushrooms are better suited for humid environments. Place them above soil level on small raised stones or driftwood to avoid direct contact with wet areas.
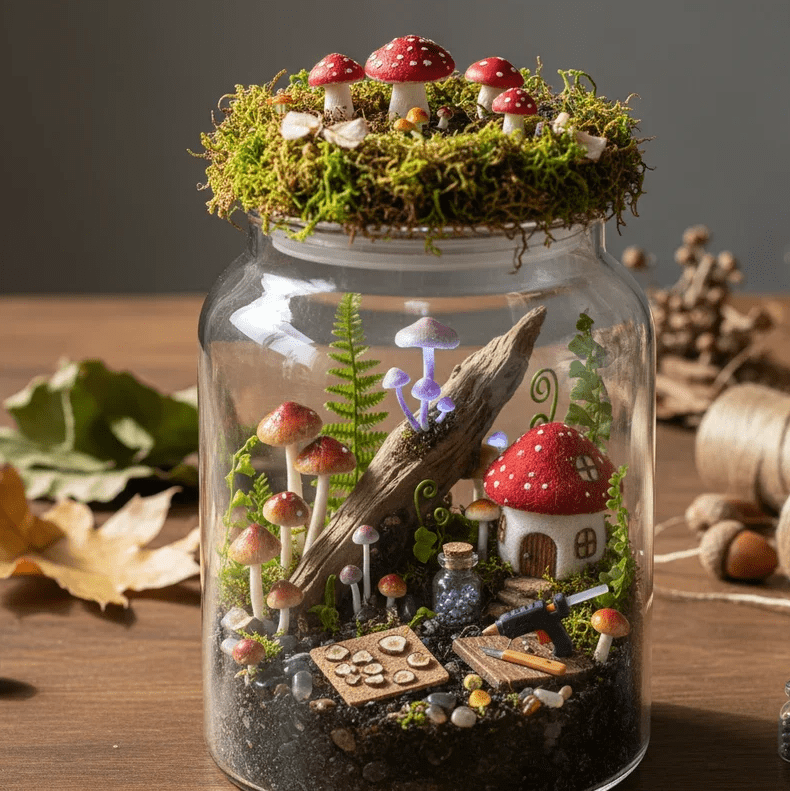
From hands-on projects, I have found that a simple fairy nook can transform a forgotten corner. A wooden crate or low shelf can become a woodland scene with:
- A few clay mushrooms
- Tiny pebbles or gravel paths
- Preserved moss (which requires virtually no care)
- Miniature doors or windows made from scrap wood or clay
This type of vignette appeals to children and adults alike and pairs beautifully with soft string lights or a nearby reading chair.
Mushroom planters and plant stakes add practical charm:
- Sculpt small mushroom caps on skewers or metal plant stakes to decorate potted herbs.
- Create a shallow planter with mushroom reliefs along the rim for succulents or low-maintenance houseplants.
Remember that most clays are not frost proof, so if you use mushroom planters outdoors, bring them in during harsh weather to prevent cracking. For indoor plants, choose species that match your light conditions, such as pothos or snake plants for low light and herbs or succulents for bright windows.
Functional Clay Mushroom Pieces: Trinket Dishes, Lamps, and Hooks
Clay mushroom decor does not need to be purely ornamental. Turning fungi motifs into functional objects keeps your cottagecore home both pretty and practical. Small mushroom-shaped trinket dishes are ideal for rings, earrings, and hair pins. Sculpt a shallow dish, then attach one or two miniature mushrooms off to the side so the flat surface remains usable.
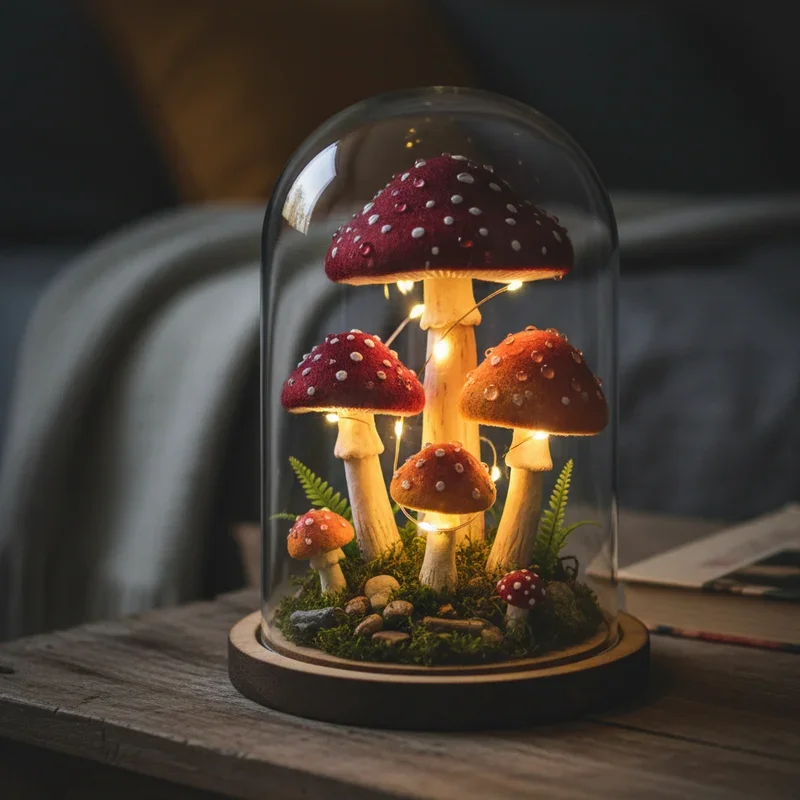
In my experience working on customized decor, mushroom lamps are often the most beloved pieces. With careful attention to safety, you can create a mushroom shade that fits over a store-bought LED tealight or battery-operated fairy lights. Always use low-heat LED sources and follow manufacturer guidelines, as clay can get warm if paired with high-heat bulbs. Avoid placing any clay shade directly on a hot bulb.
Other functional ideas include:
- Mushroom wall hooks:
- Sculpted caps as decorative ends on sturdy wooden or metal hooks
- Incense holders:
- A mushroom base with a small hole to hold stick incense, placed on a fire-safe tray
- Desk organizers:
- A flat base with several mushrooms surrounding shallow wells for paper clips or pins
These pieces blend seamlessly into boho cottagecore interiors while providing everyday utility.
- A flat base with several mushrooms surrounding shallow wells for paper clips or pins
Seasonal and Holiday Mushroom Decor Variations
Clay mushroom decor adapts beautifully across the seasons, which helps you keep your cottagecore home feeling dynamic without constant shopping. For spring, you might lean into pastel caps, soft green stems, and tiny painted flowers along the base. Summer decor can focus on bright woodland reds and whites with fresh foliage nearby, such as jars of wildflowers or potted herbs.
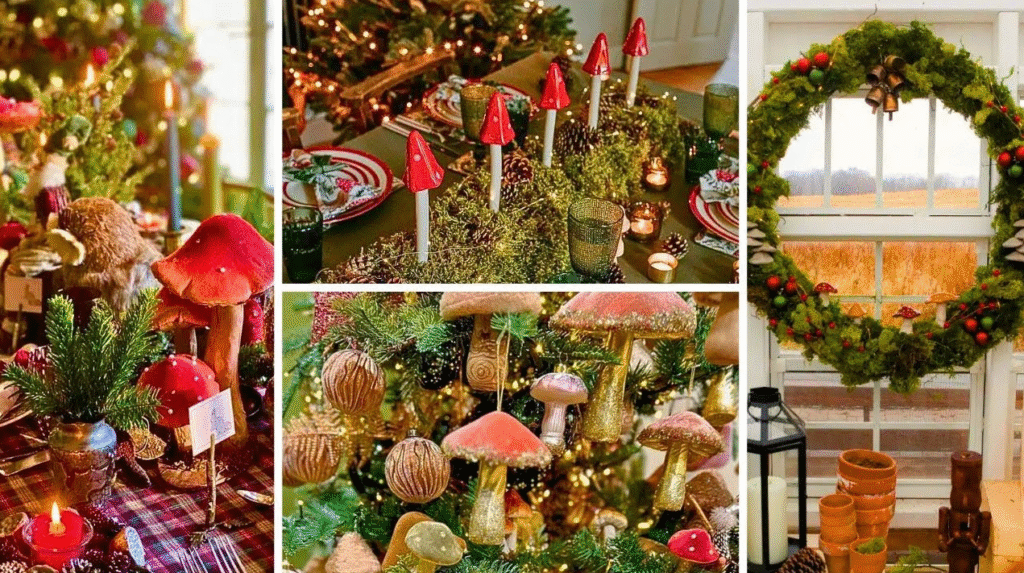
Based on my past work with clients, autumn is when mushroom decor feels most at home. Deep rust, mustard, and chocolate brown caps pair effortlessly with pumpkins, woven baskets, and dried leaves. You can also add subtle metallic accents, such as a thin line of gold paint around the cap edge, to catch candlelight on darker evenings. For winter, cool gray stems with white or icy blue caps evoke quiet forests and pair beautifully with evergreen branches and simple white lights.
Seasonal variations to try:
- Spring:
- Add tiny sculpted snails or flowers at the base of mushrooms
- Autumn:
- Incorporate acorns, pinecones, and mini pumpkins in the same vignette
- Winter holidays:
- Tie a narrow velvet ribbon around a tall mushroom stem
- Paint tiny snowflake patterns on white caps
Maintain a consistent core palette to avoid feeling like you are completely redoing your decor each season. A few revised accents can be enough to shift the mood while preserving your underlying cottage-core boho style.
Conclusion: Bringing Storybook Magic Into Everyday Spaces
Clay mushroom decor offers an approachable way to layer storybook charm, handmade texture, and earthy color into a cozy cottagecore home. With the right clay, colors, and styling, these small fungi sculptures can feel artful and grown-up while still delighting the imagination.
In my experience working with cottage-core and boho-inspired interiors, the homes that feel the most magical are usually the ones that embrace small, thoughtful details. Clay mushrooms are perfect for this because they reward close attention: tiny speckles, curved stems, and subtle color variations all become miniature discoveries. Whether perched on a bookshelf, nestled among houseplants, or glowing softly as a bedside lamp, they quietly reinforce the idea that home is a gentle, enchanted refuge.
As you experiment, start with a simple color palette and a few basic forms, then gradually explore more complex pieces like lamps, planters, and fairy nooks. Tune into how each vignette makes the room feel, not just how it looks. Over time, your handcrafted fungi collection will tell a story of seasons, creativity, and slow-living joy in your own cottagecore sanctuary.
Excerpt:
Clay mushroom decor is an inviting way to infuse cottage-core and boho homes with woodland charm, from tiny shelf accents to functional pieces like lamps and trinket dishes. With simple sculpting techniques, earthy color palettes, and thoughtful styling, handcrafted fungi can turn everyday corners into cozy, storybook-inspired retreats.

Maira Lindey is a home decor enthusiast who loves transforming ordinary spaces into warm, stylish havens. Through her writing, she shares simple, creative ideas that help people make their homes both beautiful and comfortable. Her approach combines aesthetic charm with practical solutions for everyday living.
With years of experience experimenting with colors, textures, and layouts, Maira enjoys guiding readers to express their personality through home design. She believes that even small changes can have a big impact, and she focuses on tips that are easy to implement without overwhelming the space or the budget.
Beyond decorating, Maira finds inspiration in nature, art, and everyday life. She encourages her readers to embrace creativity and make spaces that feel uniquely theirs, blending functionality with style in ways that are both inviting and livable.