Create dreamy, surreal table centerpieces that play with reflection, light, and illusion, turning any dinner or event into a miniature art installation. This guide explores practical, safe, and imaginative ways to use mirrors and lighting to cast your tabletop into a whimsical alternate reality.
In this article you will learn how to design whimsical surreal DIY centerpieces using mirrors and light, blending practical craft tips with imaginative styling ideas. These techniques work for home dinners, weddings, and creative events where you want your table to feel like a small, dreamlike stage.
Dreamy Mirror Worlds for Surreal DIY Centerpieces
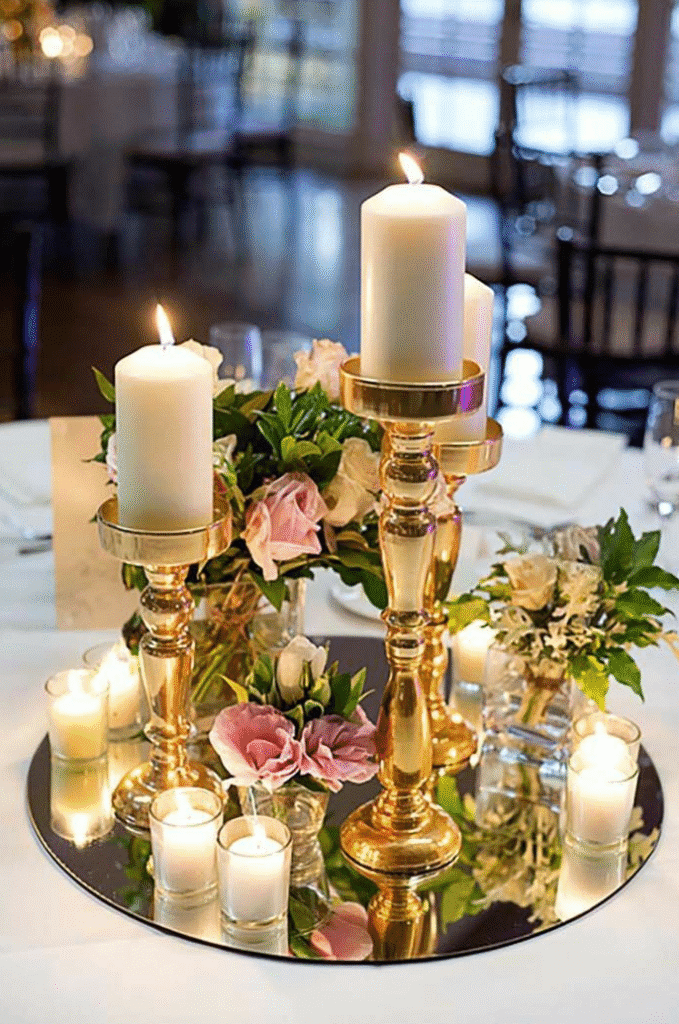
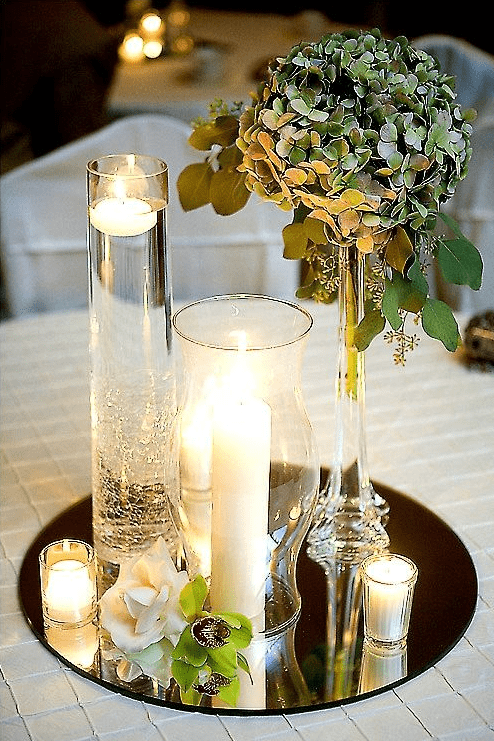
Mirrors are the foundation of most surreal centerpieces because they instantly multiply objects and light, making a small arrangement feel like an endless landscape. Start by selecting a base mirror that suits your table shape and theme. Round mirrors suggest little moons or portals; rectangles feel like corridors or windows into other worlds. For safety, use framed mirrors or acrylic mirror sheets on busy tables to reduce the risk of sharp edges and breakage, especially at events with children or crowded seating.
From hands-on event styling, I have found that mirrors between 10 and 16 inches wide are ideal for dining tables: large enough to hold a full vignette, but still leaving room for plates and glasses. Place the mirror flat as a base, then build your surreal world vertically with layers of objects, height variations, and contrasting textures. Think of the mirror as a small lake or a floating stage where strange, dreamlike items gather in a calm reflective pool.
To amplify the surreal effect, select objects that look ordinary alone but uncanny in reflection. You might pair tiny ceramic animals with glass marbles that echo like scattered planets, or mix vintage keys with translucent crystals so they appear to float over their mirrored twins. Try choosing 2 to 3 recurring elements and repeating them to create rhythm:
- A few identical glass bottles in varying heights
- Several clusters of the same flower or dried branch
- Repeated spheres like pearls, ornaments, or marbles
The mirror makes these repetitions look more elaborate and otherworldly, even though the ingredients are simple and affordable.
Enchanted Light Tricks to Elevate Tabletop Magic
Light is what turns a mirrored arrangement into a surreal centerpiece, because even subtle glows bounce off reflective surfaces and create shimmering illusions. For practical tabletop use, prioritize cool-running, low-voltage lighting options. LED fairy lights, battery tea lights, and LED candles are safer than open flame, especially when placed near fabric, dried botanicals, or paper props. Verified product specs will usually note that LED fairy lights remain cool to the touch during typical event durations.
In my experience working on intimate dinner parties, warm white light around 2700K to 3000K feels the most magical, giving guests a flattering, candlelike glow while still making the centerpiece look crisp. Thread micro fairy lights under translucent fabrics or inside glass vessels on top of the mirror, so that it appears as if light pools from inside the arrangement rather than from visible bulbs. Scatter a few battery tea lights around the edge of the mirror to create depth and soft flicker without overwhelming guests with brightness.
Color can push your design deeper into surreal territory. Soft blue or violet LEDs create a dreamlike, moonlit quality that works well with silver mirrors and glass. Carefully used, a single accent of red or magenta light can make one object look charged with secret energy. For dinner tables, avoid very bright saturated colors aimed directly at faces, since they can distort skin tones and feel harsh. Instead:
- Hide colored LEDs behind frosted glass or vellum
- Aim them at background objects, not directly at people
- Combine one subtle color wash with predominantly warm white light
The result is an enchanted glow that feels strange yet inviting, like a scene from a surreal film gently unfolding in the center of your table.
Building a Surreal Mirror Base: Shapes, Layers, and Safety
The base is where your surreal DIY centerpiece gains structure and stability. Choose mirror shapes that echo your theme: round for celestial or underwater scenes, square for modern surrealism, and irregular or cut-acrylic bases for fantasy landscapes. Acrylic mirror sheets are lighter and more impact resistant than glass, which is helpful for events where centerpieces may be moved frequently. For safety, especially in homes with pets or kids, apply soft adhesive bumpers under the corners to prevent sliding and scratching.
From hands-on work with clients, I have found that layering mirrors creates a powerful illusion of depth. Stack a smaller mirror at an angle on top of a larger one and prop it up with hidden supports like painted blocks or sturdy coasters. This gives you multiple reflective planes that bounce light and objects into seemingly impossible positions. Keep angles modest, around 10 to 20 degrees, so items still sit securely and do not roll off. Always confirm stability by gently tapping the table before guests arrive.
To make the base look more like a surreal landscape and less like a home decor store display, soften the edges of the mirror with materials that blur the boundary. Consider:
- Wisps of tulle, chiffon, or gauze that spill slightly over the mirror edge
- Strips of moss (real or preserved) around the perimeter for a dream-forest look
- Iridescent cellophane crumpled into low hills and valleys
This edging hides transitions between table and mirror, tricking the eye into treating the mirrored plane as a self-contained world. It also offers discreet places to tuck battery packs, wires, and supports so the scene appears effortless and magical.
Curating Whimsical Objects: From Everyday Oddities to Miniature Worlds
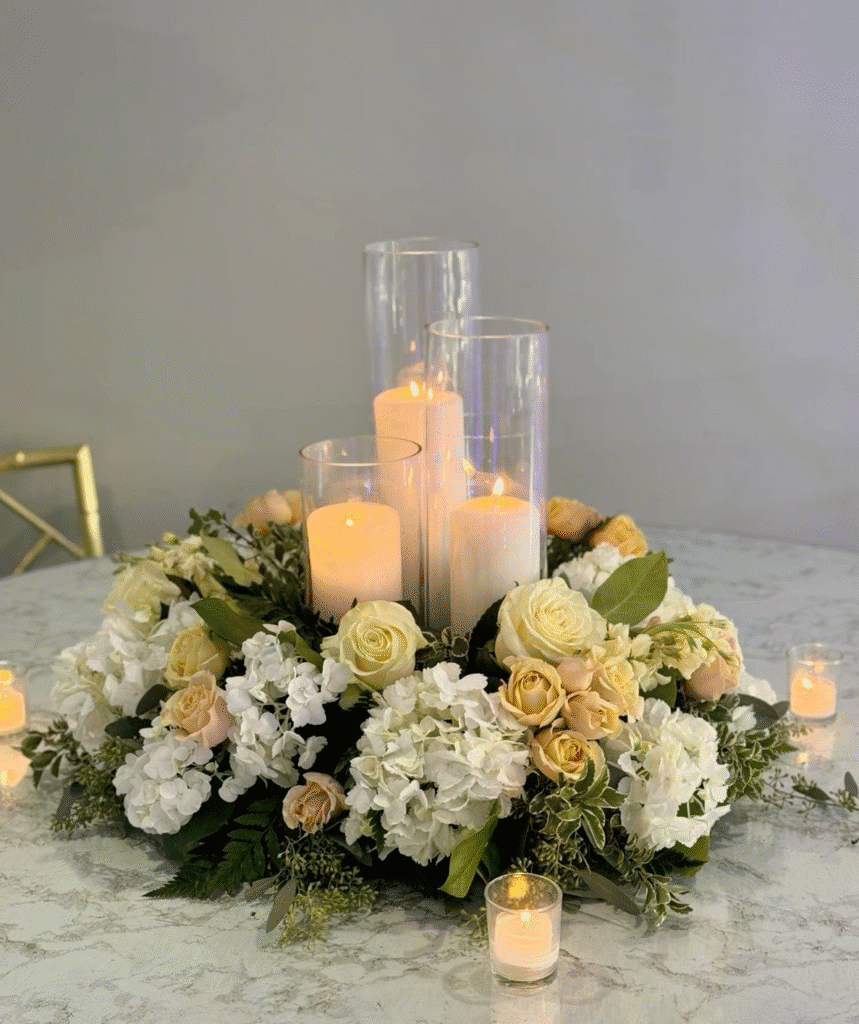
The heart of a surreal centerpiece is its cast of characters: the objects that inhabit your mirrored world. Think of them like actors in a scene instead of random decorations. Choose items that tell a story or spark questions, such as tiny chairs around an oversized crystal, antique keys resting on moss, or a porcelain hand reaching toward a floating glass sphere. Everyday objects with strange juxtapositions create surreal impact without needing expensive props.
In my experience styling surreal table decor, a mix of three object categories tends to work best:
- Organic elements such as dried flowers, seed pods, feathers, shells, or branches
- Geometric pieces such as cubes, spheres, prisms, and bottles
- Narrative miniatures such as figurines, toy animals, tiny books, or clocks
When combined on a mirror, these categories form a mini ecosystem that feels both familiar and uncanny. A row of toy horses marching toward a glass pyramid, reflected again and again, looks like a procession through an endless desert of light. Tiny paper boats floating on a mirrored “sea” around a glowing LED pearl can turn a simple dinner into a quiet voyage.
For a cohesive whimsical look, pick a limited color palette: perhaps ivory, blush, and gold for a dreamy wedding, or teal, silver, and violet for a night-sky theme. Too many clashing colors can break the illusion and make the centerpiece feel cluttered. It helps to:
- Repeat at least one object type three times
- Use odd numbers of items for visual balance
- Keep the tallest piece at the center or slightly off center
These simple composition principles keep the scene surreal but readable, so guests feel delighted rather than visually overwhelmed.
Playing with Height, Reflection, and Perspective
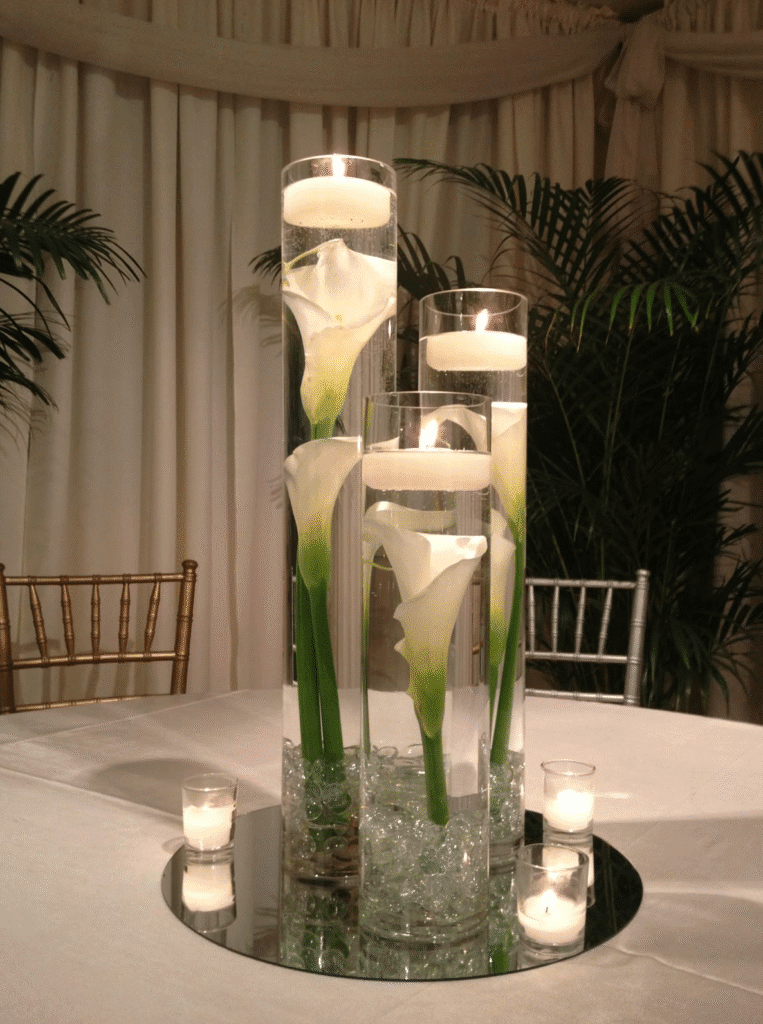
Surreal centerpieces rely heavily on perspective tricks that make objects appear to shrink, stretch, or float. Achieve this by staggering object heights and making strategic use of reflections. Place taller items in the middle and shorter ones toward the edges so that their reflections overlap and intertwine. You can quietly alter height by placing objects on inverted glasses, hidden blocks, or stacked coasters wrapped in fabric that matches your palette.
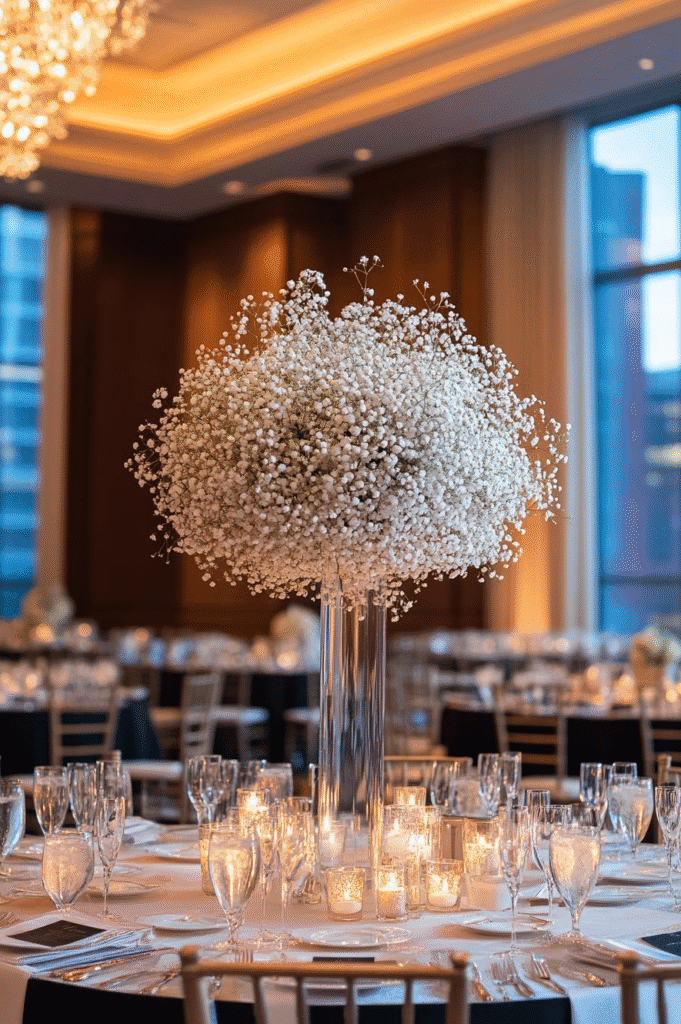
Based on real-world testing for event layouts, I recommend keeping most centerpieces between 8 and 14 inches high for seated dinners. This height range is tall enough for drama but low enough to allow eye contact across the table. If you want a particularly tall surreal piece, concentrate the highest elements in the center of larger tables and leave clear sight lines at guest eye level. Always do a seated test from several chairs before finalizing the arrangement.
To intensify the surreal vibe, experiment with forced perspective. Place small items near the front edge of the mirror and larger versions of similar shapes further back, so the mirror doubles the effect and suggests a deep imaginary landscape. For example:
- Tiny trees in the foreground with larger branch clusters at the back
- Small glass orbs near guests with bigger orbs behind a central figure
- A miniature chair in front with a taller, ornate chair form or sculpture behind
When the reflections merge, they can look like a path receding into infinity or a world bending away from normal rules of size and distance. This use of light, reflection, and scaling is a classic surreal design trick that translates perfectly into DIY tabletop art.
Integrating Color, Texture, and Light Temperature
Color and texture control the mood of your centerpiece as much as the objects themselves. Smooth, glossy surfaces like glass and polished metal emphasize reflections, while rough textures like bark, fabric, and stone create contrast that keeps the scene from feeling flat. Combine at least one reflective texture with one matte or fibrous texture so the eye has both shine and softness to explore.

From hands-on projects, I have found that mismatching light temperature can break the illusion. Whenever possible, keep all visible light sources at similar color temperatures. If you are using warm white fairy lights, avoid mixing in very cool white LEDs that can look bluish and clinical next to them. Most decorative LED products list their approximate color temperature; look for sets that cluster in the 2200K to 3000K range for cozy surreal glow, or 4000K for a slightly more moonlit, gallery-like effect.
Color choices can gently steer your theme:
- Pastels with warm white light for whimsical fairy-tale tablescapes
- Muted neutrals with cool light for dreamlike, art-gallery surrealism
- Jewel tones with subtle color accents for fantasy or celestial themes
Texture also plays a key role in safety and practicality. If you use loose glitter or fine confetti, keep it contained in glass vessels to avoid mess and accidental contact with food. Soft textiles should be placed far from real candles. When in doubt, opt for LED candles and fairy lights inside or around fabric to maintain the dreamy look with a lower fire risk.
Practical Assembly Tips, Safety, and Easy Setup
Surreal decor looks spontaneous, but successful DIY centerpieces benefit from a clear assembly plan. Start with a dry run on a side table or floor. Arrange your mirror base, objects, and lights, and take a quick photo from several angles. This lets you refine composition and object choices before event day. Keep a simple map of the layout in your phone so you can re-create it quickly on-site.
In my experience preparing centerpieces for transport, modular design makes things much easier. Group items into clusters that can be moved as units, such as:
- A glass cloche containing several small figurines
- A shallow dish filled with crystals and a coiled fairy light
- A small pedestal with a primary focal object
Place these modules onto the mirror at the venue instead of moving a fully assembled, fragile piece. This approach reduces risk of damage and allows for quick adjustments to fit real table dimensions, which sometimes differ slightly from plans.
Safety is paramount whenever mirrors and lighting are involved. Basic guidelines include:
- Choose tempered glass or acrylic mirrors for crowded events when possible
- Tape or secure any exposed wires away from drink zones
- Confirm that all battery compartments are closed and child resistant
- Keep real candles at least 12 inches from flammable decorations and never directly on bare mirror, as temperature differences can stress some glass types
Following these checks helps keep the surreal magic enjoyable and low risk for everyone at the table.
Styling for Occasions: Weddings, Dinners, and Themed Parties
Once you understand the core techniques, you can adapt whimsical surreal mirror centerpieces for many occasions. For weddings, lean into romantic surrealism with soft florals, trailing ribbons, and scattered pearls reflected in the mirrored base. Combine warm white fairy lights inside translucent vases so the whole arrangement glows gently through the evening. Personalized elements, such as miniature framed photos of the couple or tiny replicas of shared interests, transform the centerpiece into a dreamlike story of their relationship.
For intimate dinner parties at home, smaller, quieter surreal compositions often feel best. A single mirrored tile with one glowing glass vessel, a few sculptural branches, and a scattering of reflective stones can set a contemplative mood without dominating the table. In my experience hosting creative dinners, guests often appreciate one or two intriguing details they can discover up close, rather than an overwhelming display. Include conversation-starting pieces like tiny handwritten fortunes, surreal illustrations, or miniature books.
Themed parties invite bolder surreal gestures. For a celestial night, imagine:
- A round mirror as a “moon pool”
- Silver or iridescent confetti trapped under a layer of clear mesh
- Battery tea lights hidden inside frosted glass “stars”
For a whimsical forest, swap in moss, mushrooms (real or faux, ensuring non-toxic materials if guests may handle them), and glowing “firefly” fairy lights hidden within branches. Each theme uses the same core elements mirrors, lights, and odd objects but recombines them into new dreamlike narratives.
Conclusion: Bringing Surreal Mirror & Light Dreams to Your Table
Whimsical surreal DIY centerpieces with mirrors and light allow anyone to turn a simple table into a personal piece of dreamlike theater. With a few thoughtful techniques and safety-conscious choices, your guests can dine inside a small world of illusions and reflective wonder.
In conclusion, the most compelling surreal centerpieces grow from a balance of intentional design and playful experimentation. By starting with a secure mirrored base, curating a cast of whimsical objects, and layering in gentle, well-chosen lighting, you create an environment where everyday items feel strange, poetic, and worth a second glance. Based on years of working with reflective decor, I have seen that even modest materials can feel extraordinary when arranged with care and curiosity.
As you explore these ideas, treat each centerpiece like a small, evolving artwork. Test your lighting in the actual room, adjust colors to suit your event, and give yourself permission to edit out anything that feels cluttered or distracting. Over time, you will develop your own surreal vocabulary of shapes, textures, and stories, so every gathering becomes an opportunity to invite friends into a new mirrored dreamscape of your own design.

Maira Lindey is a home decor enthusiast who loves transforming ordinary spaces into warm, stylish havens. Through her writing, she shares simple, creative ideas that help people make their homes both beautiful and comfortable. Her approach combines aesthetic charm with practical solutions for everyday living.
With years of experience experimenting with colors, textures, and layouts, Maira enjoys guiding readers to express their personality through home design. She believes that even small changes can have a big impact, and she focuses on tips that are easy to implement without overwhelming the space or the budget.
Beyond decorating, Maira finds inspiration in nature, art, and everyday life. She encourages her readers to embrace creativity and make spaces that feel uniquely theirs, blending functionality with style in ways that are both inviting and livable.